
Golang is one of the trending programming languages nowadays. This article discusses two ways to install golang in windows. The first approach uses an MSI installer while the second approach uses the source code to install go on a windows machine.
Check if Golang Is Already Installed
Before installing Golang, let us first check if it is already installed on our machine. For this, open the command prompt and execute the go version command. If Go is already installed on your machine, the version of Golang gets printed. Otherwise, the command prompt raises the CommandNotFoundException error.

As you can see, our system ran into an error after executing the command go version. Hence, Golang isn’t already installed on our machine. So, let us install go on our windows machine.
Install Golang in Windows Using the MSI Installer
To install golang, let us first discuss the approach using the MSI installer. The steps have been discussed in the following subsections.
Download the MSI Installer
To install golang on your windows machine, go to https://go.dev/. You will get the following screen.

On the above page, click on Download. It will take you to https://go.dev/dl/. Here, you will get the following page.

In the above image, you will see different options to install golang. As we need to install Go on our windows machine, you can click on the box having the link to the Windows MSI installer. The MSI installer file will be downloaded to your system s shown below.

Install Golang on Windows Using MSI Installer
Once the file is downloaded, go to the directory where the file has been stored. Double Click on the file containing the MSI installer. This action will launch the installer and you will get the following screen.

Click on the next button. You will get the following screen.

Check the tickbox to accept the terms and conditions. Then, click on the Next button. After this, the installer will ask you for the directory where you want to install Golang. You can directly paste the path to the directory or browse the file system using the browse button on the following screen.

After specifying the location where you want to install golang, click on the Next Button. You will get the following screen.

On the above screen, click on the Install button. This will initiate the installation process.
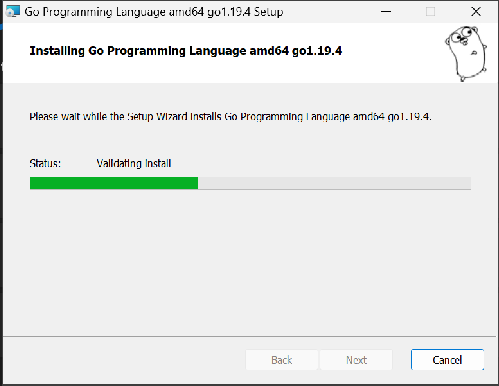
After completion of installation, you will get the following screen.

Click on the Finish button to exit the setup wizard.
Verify the Golang Installation
To verify the Golang installation, we will open the command prompt and execute the command go version. If the version of Golang gets printed, it is installed on our machine. Otherwise not.

In the above image, you can observe that the Go version has been printed on the screen. Hence, Golang has been successfully installed on our system.
Verify Golang Installation Using Environment Variables
After installing golang, the MSI installer also specified user and environment variables. You can verify this using the following steps.
Open Settings and go to System>About. You will get the following screen.

On the above screen, Click o Advanced System Settings. After clicking, you will get the following screen.

On the above screen, Click on Environment Variables. Then, you will get the following screen.

In the above screen, you can observe that the GOPATH variable has been specified with the location of the golang installation in User Variables. This confirms that Golang has been successfully installed on your windows machine.
Suggested Reading: Install Golang on Linux
Install Golang in Windows Using the Source Code
The MSI installer installs the latest version of Golang on your machine. If you want to install an older version of Golang on your windows machine, you can directly install it using the source code. The steps for doing this have been discussed in the following sections.
Download Source Code
To download the source code, go to https://go.dev/dl/. On the top of this page, You will get Featured Downloads that have links to go installers for different operating systems. Below that, you will get the “Stable versions” section. Scroll down to that section.

In the Stable versions section, you will find different go installers and source codes for various operating systems. As we have to install golang on windows, we will download the zip file containing the source code archive. Do not download the installer.

Once you click on the zip file link, it will be downloaded on your machine as shown below.

Start Golang Installation in Windows Using the Source Code File
To install Golang, we first need to extract the source code files from the zip file. For this, right-click on the compressed zip file. You will get the following options.

From the above options, Click on “Extract All”. After this, the file system will ask you for the location where you want to extract the files. I want to install Go in Program Files. So, I will go and select it after browsing the file system. You can select any directory as per your choice.

After selecting the destination folder, we will proceed ahead. As we are extracting the files into the Program Files folder, the file system will ask for administrator permission as shown below.

If you are not copying your file in the drive containing the windows installation, you might not get the above prompt. If you get it, Click on Continue. After this, the golang files will be extracted in the destination directory and a new directory named go will be created. You can observe this in the following image.

Specify Environment Variables for Golang Installation
Now that you have extracted the files, we need to inform the operating system that we have downloaded the source code of a program. For this, we need to specify the Environment variables.
For this, Go to Advanced System Settings.

Click on the Environment Variables button. You will get the following screen.

In the above image, there are two types of environment variables i.e. System variables and User Variables.
- In the User Variables, we need to specify the location of the Go folder.
- In the System Variables, we need to specify the location of the binary files of Golang i.e. the bin folder in the go directory.
To specify the User Variable, click on the new button below the User variables. You will get the following prompt.

In the above prompt, put the variable name as GOROOT and the Variable value as the full address of the go directory. Next, Click OK.
In the below image, you can observe that the GOROOT variable is created with the full pathname of the go folder as its value.

Now, we need to specify the location of binary files in the System Variables. For this, Click on the “Path” variable in System variables as shown in the above image. Once the Path variable is selected, Click on the Edit button. After this, you will get the following screen.

In the above screen, click on NEW and add the location of the Binary folder of golang i.e. go/bin. After this click on OK.
Remember that we have to put the location of the go folder in user variables and the go/bin folder in system variables.
You will be sent back to the environment variables screen. Click OK there too and close the Settings. After this, the installation process is complete.
Verify Golang Installation in Windows
Now, let us verify the golang installation on our windows machine. For this, we will open the command prompt and run the statement “go version”.

In the above image, you can observe that the system prints the version of Golang installed in our system. Hence, we have successfully installed golang in windows using the source code.
Conclusion
In this article, we have discussed two ways to install golang in windows. For this, we have used step-by-step illustrations with images. I hope you were able to understand the entire process and install golang on your windows machine.
To learn more about programming, you can read this article on command line arguments using sys.argv in python. You might also like this article on python simplehttpserver.
Stay tuned for more informative articles on python and go programming.
Happy Learning!
Donate to Avid Python
Dear reader,
If you found this article helpful and informative, I would greatly appreciate your support in keeping this blog running by making a donation. Your contributions help us continue creating valuable content for you and others who come across my blog.
No matter how big or small, every donation is a way of saying "thank you" and shows that you value the time and effort we put into writing these articles. If you feel that our article has provided value to you, We would be grateful for any amount you choose to donate.
Thank you for your support!
Best regards,
Aditya
Founder
If you want to Pay Using UPI, you can also scan the following QR code.
